In this article, we will show you how to connect Firmao with Voiso and what you can use this integration for. It is straightforward because it is done through Zapier.
Voiso is an AI-driven, cloud contact center platform renowned for its fast setup, ease of use, quality of support, and reliability. Boost customer connectivity with omnichannel, orchestrate inbound workflows for swift resolutions, and automate outbound campaigns that yield real results – all with a single platform designed with simplicity in mind.
Zapier is a platform that allows you to integrate different applications and tools, automating your work. The integration between Zapier, Firmao, and Voiso allows for the automatic data transfer between these platforms. When you add a new Company in Firmao, the data will go straight to Voiso, and messages will be sent. This allows you to automate many time-consuming activities and ensures that you have up-to-date data.
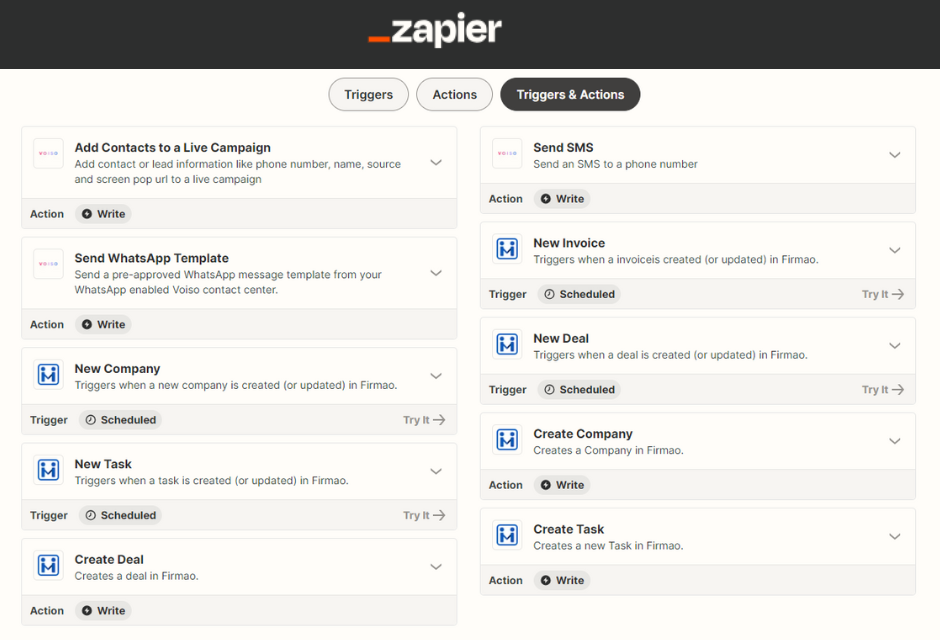
Zapier – Triggers and Actions
The integration between Zapier, Firmao, and Voiso offers various Triggers and Actions to automate data flow between these platforms.
Triggers are the events that trigger automatic actions in the integration. For example the trigger can be a New Task, Invoice, Deal, Company in Firmao.
Actions: are the specific actions that are taken as a result of triggers. For example, when a new Invoice is created in Firmao, a new message can be sent by Voiso.
What needs to be done to connect applications in Zapier?
Firmao: Log into your account, click the button in the right corner (with the letter A—admin), and click “company settings.” On the left, you’ll have different categories—click on Integrations. On the top, click on “API,” then click “Enable API.” Here, you’ll have the API login and Password—those are the credentials needed for you to sign in to Zapier. You can set the rest simply via Zapier.
Voiso: To connect, you’ll need a User Key—you can find it on the user settings page. You’ll also need a Contact Center Key that you can obtain from your Voiso account manager. The last thing you’ll need is the Cluster ID, which is the first part of your contact center URL (e.g., in https://cc-ams03.voiso.com, ‘cc-ams03’ is the cluster_id).
How to create a working Zap:
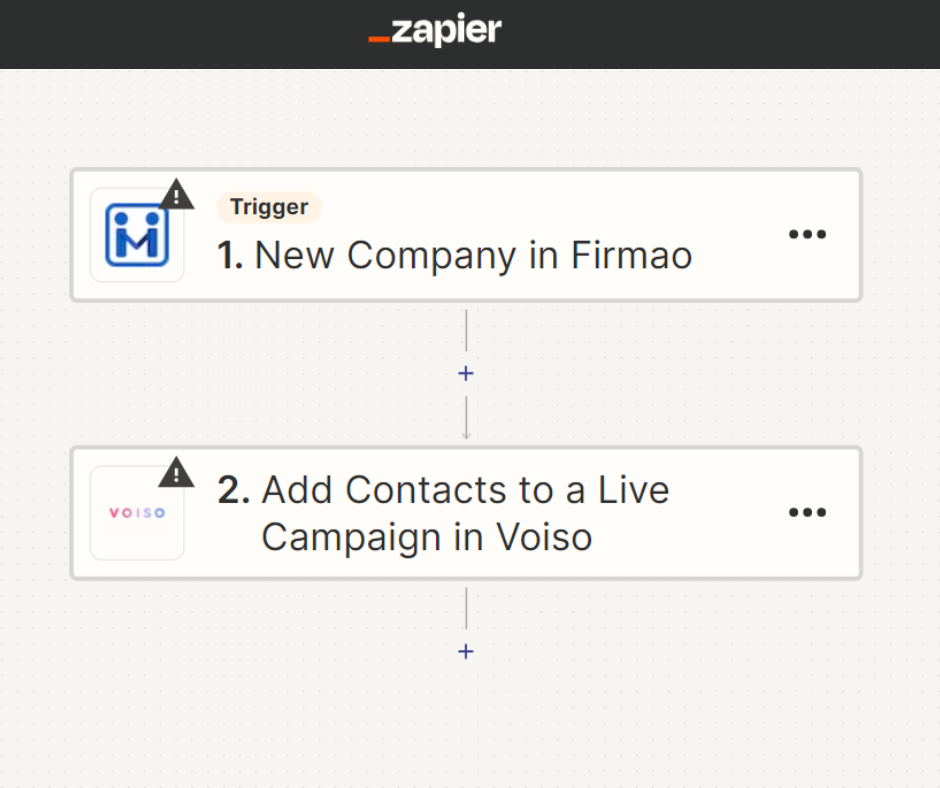
We will show you how to create a working Zap with Firmao as a Trigger and Voiso as an Action. Of course, you can test it yourself and create other interesting Zaps using those softwares together—many opportunities await!
- Choose a trigger, Firmao. This will be the factor that triggers automation, for example, New Company.
- Configure the first step.
- Check the data and test the performance of Zap.
- Configure the second stage: Select Voiso and choose what action the trigger should activate, e.g., adding contacts to a Live Campaign.
- Fill in the data you want to transfer from Firmao, ex. Phone number, Contact name, Contact URL.
- Test the performance of Zap.
- The automation is ready! As a result, when a new Company is added to Firmao, the data will go straight to Voiso, creating new Contacts for a Live Campaign
Preparing the whole Zap took less than 5 minutes. Of course, there is more than one way to create the Zap. Test it yourself to find the perfect connection between our software.